I’ve been experimenting with sous vide cooking for years now. The reality is sous vide machines are useful and provide a lot of flexibility for anyone who needs to heat water precisely to a stable temperature.
Away from food, homebrewing is one area where I think a sous vide is particularly useful. Keep reading if you’re interested in sous vide brewing.
Table of Contents
Can You Brew Beer with a Sous Vide Machine?
Aside from using the appliance for cooking food, especially meat, the sous vide machine is fast becoming the contraption of choice for homebrewing. It is the most affordable means of making beer with quality.
Sous vide, which translates into “under vacuum” in French, is ideal for brewing beer because it uses an immersion circulator to keep the water bath temperature at a precise temperature for hours.
The sous vide process utilizes a vaccum-sealed plastic bag in a bath of water to cook food slowly. The circulator makes brewing more effective and places it on a smaller scale than a traditional commercial brewery.
The key is maintaining an even mash temperature for brewing beer during the mash process.
This innovative brewing technique is growing quickly with avid home brewers and even has a Facebook group called “Sous Vide Beer Brewing” is booming with over 4,000 members.
The use of the sous vide precision cooker makes it possible for hobbyists to perform all-grain brewing at 80 percent effectiveness, which is essential to stellar beer-making, and in small batches.
This process is made easier with the use of consistent heat and improved water-to-grain contact from the immersion circulator.
Sous vide mashing supports the brewing process by holding down gas costs, replacing such other beer-making equipment as propane burners, which can be costly in terms of fuel.
In so doing, the process also cuts back on pollution, rendering it environmentally-friendly.
Sous Vide Homebrewing Equipment
The homebrewing process using sous vide utilizes the following equipment:
- Sous vide immersion circulator
- External heating source to heat strike water during brewing
- A screen to block a bag of grain from machine uptake
- A container of white vinegar to clean the equipment
- Water, also to clean the equipment
How to Homebrew with Sous Vide Step-by-Step Guide
Step 1: Fill a pot with about three-and-a-half gallons of water.
Step 2: Place the sous vide machine inside and set the temperature for steeping or mashing.
Step 3: As the water heats up, prepare your grains, extracts, and hops and place the grains in a paint-strainer bag.
Step 4: When the water reaches its temperature in about a half-hour, put the bag in the pot and use a clip to hold the bag in place. Set the timer for the amount of time to steep or mash.
Step 5: After reaching that time, crank up the stove burner and set the sous vide to about 190 degrees Fahrenheit to boil the water as quickly as possible.
Step 6: Once you’ve reached the right temperature, pull the bag out of the water and let it dry.
Step 7: Add your chosen beer extract as the water approaches the boiling point.
Step 8: After boiling, plunge the kettle in a sink filled with cold water and mix.
Step 9: Take the kettle, drain it and put the water in the sink. Repeat this process several times until you decrease the temperature to 100 degrees Fahrenheit.
Step 10: Before you begin brewing, buy three to four gallons of spring water from your local grocery store and place two of them in the refrigerator to cool. By this time, two to three gallons of wort will result from the boil.
Step 11: When the kettle hits 100 degrees Fahrenheit, put the wort in the fermenter and add two gallons of the refrigerated water to achieve a pitching temperature of 70 degrees Fahrenheit. Make a gravity reading.
Step 12: Now add the one to two gallons of spring water that you stored at room temperature into the mix to hit your gravity.
Step 13: Pitch your yeast, seal the fermenter and put it in the fermentation chamber to gauge the temperature or in a warm area for it to ferment more warmly.
The sous vide cooker will get the water to precise temperatures for the brewing process. The result? Perfectly homebrewed beer using your sous vide machine.
Here’s the normal homebrewing process for comparison, so you can see how the sous vide brewing process compares to the regular brewing process.
The Regular Homebrewing Process
If I am brewing beer at home, I would first prepare all of my equipment. I must gather all of my tools in one place. I use the following:
- Brewing kettle
- Fermenter and air lock
- Funnel (optional)
- Sanitizer
- Auto-siphon
- Stirring spoon
- Beer recipe kit (or separate ingredients).
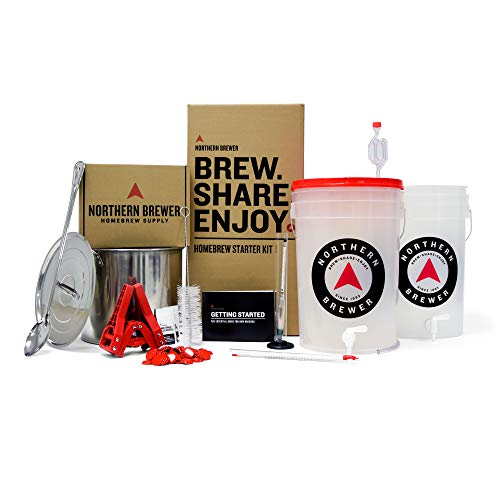
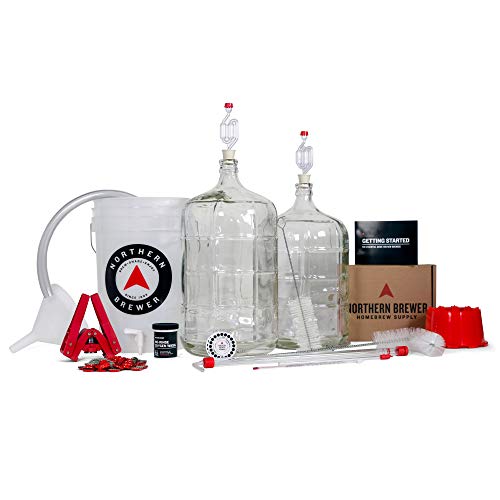
If I did not already have equipment, I would purchase a beer making kit in one box online like these Northern Brewer kits:
After collecting all of my materials, I ensure that all of my components were clean from the very outset. If not, my homebrewing process won’t be a success due to contaminants.
Additionally, I like to make sure that my beer and wine equipment stays clean at every phase of the brewing process.
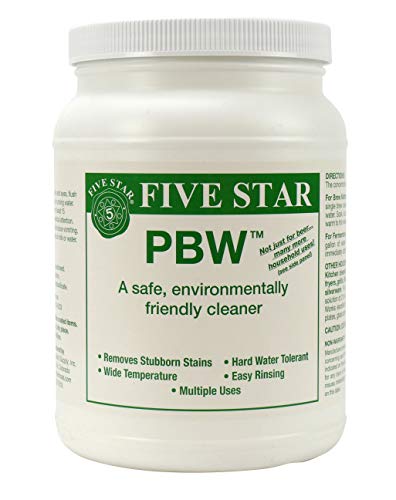
In particular, as a rule, any substance or object that makes contact with my beer after the boil process should to be sanitized. If I do not already own a sanitizer, I can always purchase a PBW or Star San.
The PBW Sanitizer – Five Star Chemical washes hard-to-reach areas and does not damage my skin, stainless steel, rubber, metals and plastic. The Star sanitizer is acid-based and no-rinse.
- Secondly, I would steep my grains in an all-grain brewing process. I fill my five-gallon kettle with two-and-a-half gallons of water.
- As I heat the water, I steep my grains for 20 minutes or until it reaches 170 degrees.
- When I remove the grains, I let the water leak from the grain bag and into the kettle without squeezing. I do not want to leech tannins into my beer that will give it an unwelcome taste.
- When my kettle is boiling, I remove the heat and add malt extracts. After they are immersed in the water, I resume boiling. Hops are now added at different points of the process.
- I consult my beer extract recipe to determine when I should add hops to the water.
- The result of the boil is wort, also known as sugar water. I need to cool my wort as soon as possible to bring it down to room temperature before I pitch my yeast.
- There are two ways to begin the cooling process.
- I can either choose to use an ice bath, which amounts to putting my pot into sink filled with ice water.
- Otherwise, I can utilize a wort chiller, which is the quickest and most effective method. I simply place the chiller into my wort. I then allow cold water from my tap enter the chiller and out into the sink.
- I re-sanitize my equipment as much of the boil has gotten onto and stained some of its parts. Afterward, I pour cooled wort into my fermenter. Some kettles, including mine, contain valves that easily transfer the wort to the fermenter.
- Then, I add sufficient water to raise the level to five gallons. I then aerate the wort by spinning it around in the fermenter as yeast requires oxygen to work.
- I then add yeast to the wort. Preferably, my yeast is dry as it is easy to use in that state since I do not have to prepare it in advance.
- Before I apply it, I must sanitize the yeast pack and scissors, snip the corner off the pack and pour the yeast into the fermenter.
- Afterward, I close my fermenter, add the airlock, and store the container in a cool and dark area.
- Certain types of brew require different types of treatment. For example, if I am making ale, the brew should stay in my chosen location at 68 degrees to ferment appropriately.
- At long last, I have effectively brewed beer.
- I allow my new beer to ferment for two weeks.
- Then I can bottle my beer.
- I begin by cleaning all of my equipment. That includes bottles, bottle filler, bottle caps, bottling bucket and any transfer hoses used. I must be sure to use a bottle brush with my bottles.
- Then, I boil my priming sugar in 16 ounces of water. Priming sugar is the type of sugar I add to my beer before bottling it to carbonate it.
- The yeast in the beer eats the sugar and makes carbon dioxide, which stays in the bottle and dissolves into the brew. The sugar is affordable, simple and produces high-quality brews.
- After the priming sugar cools, I add it to the bottling bucket.
- I move my brew by way of the auto-siphon out of the fermenter and also into the bottling bucket, leaving behind all the remaining sediment.
- Then I fill the bottles with my new beer. I attach the bottle fillers to the hose and to the bottling bucket spigot. I open the spigot and push the bottle filler to the bottom.
- I cap the bottles and store them at room temperature for two weeks, giving my beer plenty of time to carbonate. After the two weeks, I refrigerate and later enjoy my new creation.
Sous Vide Home Brewing Final Thoughts
Sous vide home brewing is very similar to traditional methods but offers many advantages over other techniques. It allows me to make better tasting beers than ever before.
It’s important to note that there are several factors that affect how well your beer will turn out. These include:
- Your ingredients
- How you cook your food
- What kind of cooker you use
- Whether you follow proper sanitation procedures when preparing your food
For more sous vide articles to up your sous vide game, check these articles out: