Sous vide containers are meant to hold water and help keep water temperatures at specific degrees.
Using insulated coolers can help with that. We take them camping, on picnics, tailgating and more because they’re great at keeping drinks cool.
What’s great is that the insulation can also do the opposite by keeping hot water, hot. Since sous vide is about cooking food in water in precise temperatures, having a good container to sous vide in is vital.
Luckily, you can repurpose an old cooler and build a sous vide cooler to cook in.
Let’s talk about the science of using coolers to sous vide in and how to DIY a sous vide cooler.
Table of Contents
Can I Sous Vide in a Cooler?
Sous vide cooking is a surefire way to cook delicious, restaurant-grade food from the comfort of your own home, but can you sous vide in a cooler? The answer is yes, you can!
I am going to show you how to build your very own sous vide cooler. The method is surprisingly simple and doesn’t require many tools or much effort.
The idea behind sous vide cooking is to let your food slowly cook by submerging and sealing it in a water bath at a constant temperature. This allows your food to reach that temperature, resulting in succulent, evenly cooked dishes.
Coolers are great insulators. They don’t only help keep your cold drinks refreshingly chilled, but they can also trap heat energy inside, keeping the temperature constant. This makes coolers the perfect energy-efficient slow cooker.
The Science Behind Coolers
We all use coolers at outdoor parties and during sunny outings when we want to keep that drink refreshingly cold. But not many of us know how coolers actually work, so I’ve investigated the science behind these simple (yet efficient) devices.
Coolers keep the temperature within them constant by using an insulation lining that is usually made of foam or plastic. This insulation helps slow down the process of convection and facilitates conduction.
Convection refers to the movement of warm air within an enclosed space, warm air rises while cool air tends to sink. Because of the insulation slowing down this process, a cooler ensures less heat is lost to the outside environment, trapping it within.
Conduction is the process of heat spreading from one object to another when they are in close proximity.
The insulation in your cooler makes for a strong barrier protecting anything inside it from the external temperatures of the outside environment.
It makes sure that the processes of convection and conduction are kept at a minimum and prevents these processes from changing with the temperature of anything kept inside your cooler, provided it is properly sealed.
The Benefits of Using a Sous Vide Cooler
Sous vide coolers have a range of benefits. When compared with using pots and some low-quality sous vide containers, sous vide coolers can provide better temperature control and preservation with the following benefits:
- They are easier to manage since you don’t have to constantly check the temperature so that your food isn’t undercooked or overcooked.
- They are relatively inexpensive and easy to assemble.
- Food cooked in a sous vide cooler cooks in its own juices, giving a juicier, more tender taste and an all-round better flavor.
- It is more consistent because you cook food at a precise temperature over a precise period of time.
- Sous vide reduces waste reduction by retaining your food’s moisture. Studies show that traditionally cooked steak loses up to 40% of its moisture.
- Because precision cooking brings food to a precise temperature and keeps it that way, cooking food using the sous vide method requires less attention, giving you more time to relax.
Sous Vide Cooler vs. Sous Vide Container
You might be wondering, why build a sous vide cooler instead of buying a sous vide container?
Most sous vide containers are made of polycarbonate plastic. While these plastics are long-lasting and impact-resistant, low-quality containers have also been shown to release trace amounts of the chemical bisphenol A (BPA) into foods and drinks.
BPA’s have been proven to have some negative health effects, particularly causing an imbalance in your body’s hormone production. This can also affect your reproductive system and lead to an increased risk for cancer.
The insulation in most coolers is made of a hard foam, such as extruded/expanded polystyrene (Styrofoam) or polyurethane foam, which is less poisonous than traditional polycarbonates.
The insulation foam also helps give you better temperature control when compared to sous vide containers that work using removable polycarbonate lids that don’t offer all-around insulation.
Sous vide coolers also tend to hold more volume of water for the same price, about 19 liters, when compared to sous vide containers that only hold about 16 liters, saving you money.
And with most coolers, this recommended maximum volume capacity can be exceeded while maintaining temperature just as well, which means you can cook larger meals at one time. This makes sous vide coolers perfect for cooking large steaks, pork cuts and those baby back ribs when entertaining guests.
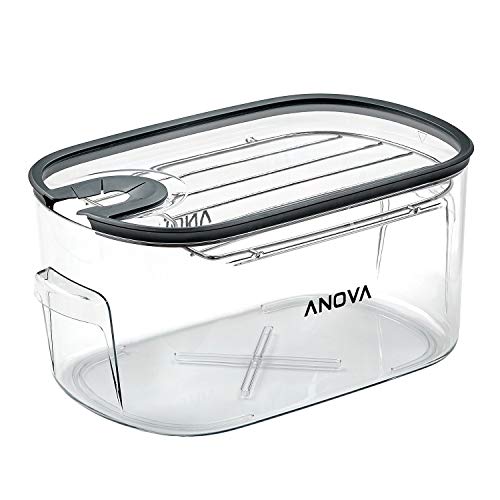
Check out this high-quality sous vide container available on Amazon to make your comparisons:
Best Coolers to Buy and DIY as a Sous Vide Cooler
Most sous vide cooler enthusiasts have had greater success with 33-quart coolers and up because of how well the insulation works.
You might have an old cooler sitting in your garage that’s not being used. If you don’t have an old one, you can my a new one pretty cheaply.
If you are looking for good results when building your own sous vide cooler, try out these coolers available online.
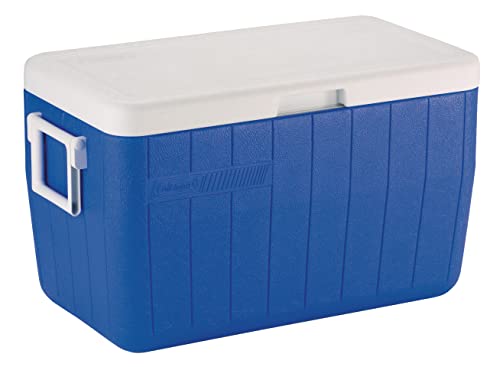
1. Coleman 48 Quart Performance Cooler
Coleman is one of the leading manufacturers of outdoor products including camping equipment, grills, stoves, lanterns, etc., so they know what they’re doing when it comes to making durable, reliable coolers.
The Coleman 48-Quart performance cooler has an insulated interior that’s rated to retain ice for 3 days in temperatures up to 90 °F. That makes it well-suited for retaining heat as well for sous vide cooking.
2. Igloo Island Breeze 48 Quart Cooler
The Igloo Island Breeze 48-quart cooler holds a whopping 76 12-ounce cans, making it perfect for cooking many steaks at once – provided your sous vide machine is powerful enough.
These coolers go for around $30.00 on Amazon.com—a good choice for a large, quality cooler on a budget.

Step-by-Step Guide to Build a Sous Vide Cooler
Once you have a cooler, follow these easy steps to DIY a sous vide cooler.
Equipment and Tools You Will Need
- Sous vide cooker – A precision cooker to trace an outline of the spot you want to drill. Anova has a high-quality lineup of precision cookers.
- A cooler to modify
- A circular hole saw, the size depending on the diameter of the cooking extension cover
- An electric drill
- Medium-grit sandpaper
- Silicon for a tighter, sealed, leak-proof hole
- Safety glasses and gloves
Build Process
1. Drill a hole in the cooler lid for the sous vide precision cooker
- Don your safety apparel and pick a spot on the lid you want to drill. I recommend the back of the cooler by the hinge so that you can open the lid as much as possible without disturbing the unit
- Measure the diameter of the sous vide unit and drill your hole according to that size using the circular hole saw. Try to make the hole a bit smaller for a snug fit.
- Use sandpaper to widen the hole if needed.
Pro tip: Drill from the underside of your cooler’s lid. This makes the process a lot easier and leaves the top, visible surface looking a lot cleaner and neat.
2. Seal all holes
- Apply silicon caulk to seal all holes in the cooler and around the rim of your main hole. You can use a scraper or credit card to smooth out the silicon.
- Wait around 10 hours for the silicon to dry and do further touch-ups if necessary.
3. Insert your precision cooker
- Once you are happy with the main hole that will support your precision cooker, insert the cooker, making sure it fits tightly to prevent air from moving in and out. Seal around the precision cooker for extra stability and support.
Once your precision cooker sits comfortably in your cooler, you are ready to sous vide with your very own sous vide cooler, it’s that simple!
Get started cooking with your new homemade sous vide cooler and these tasty sous vide recipes.
Here are other sous vide articles to check out on your sous vide journey: