When results are the top priority, sous vide is the best way to reheat steak and other foods. If time is your priority, look elsewhere.
Unlike other methods, sous vide (also known as immersion cooking) allows for precise temperature control, which eliminates the risk of cooking beyond reheating. In other words, using a sous vide will retain all the moisture of your food so it tastes freshly made.
Table of Contents
Why Reheat With Sous Vide?
Other methods of reheating food generally use a higher temperature than what the ideal internal temperature is of that which you are reheating. For example, how low can you set your oven? Is it anywhere near the 131°F of a medium rare steak? Can you regulate the heat of a pan on a stove? How often does the microwave dry out simple foods like rice?
When you use a temperature higher than what you’d like the internal temperature to be, you’re actually cooking the food all over again, which leads to overcooked foods. Ever make an attempt at reheating steaks or other meat in the oven? I’d bet it ended up overdone.
The sous vide method is the only method that allows you to precisely reheat food to your desired internal temperature, eliminating the risk of overcooking. With a steak, you can simply reheat to the desired temperature and sear it for a fresh crust.
Reheating Steak and Other Foods With Sous Vide
As discussed earlier, the precision of a sous vide cooker makes it not only the ideal cooking machine, but also the ideal reheating machine. Low and slow keeps foods tender and delicious by preserving the moisture within the food. If you’re going to use this method to reheat food, make sure you do it correctly.
Reheat leftover meat, fish, veggies, etc. by setting the water bath to the ideal internal temperature of the food you are reheating. If it was originally cooked with an immersion circulator, simply heat the water to the same temperature that was originally used. It simply doesn’t make sense to use a higher temperature because that can easily lead to overcooked food.
You should reheat your food for the minimum sous vide time recommended to cook the item. That is, if you’re warming up steaks that have a 1 to 4 hour recommended cook window, reheat sous vide for 1 hour. To continue with steaks as an example, you can reheat one-inch thick or less steaks in 40 minutes. For one-and-a-half to two-inch-thick steaks, 1 hour will suffice.
Abbreviated Instructions to Sous Vide Foods
In case helpful, below is an overview of the steps to follow to execute high quality sous vide dishes.
1. Preheat – Set Your Time and Temperature
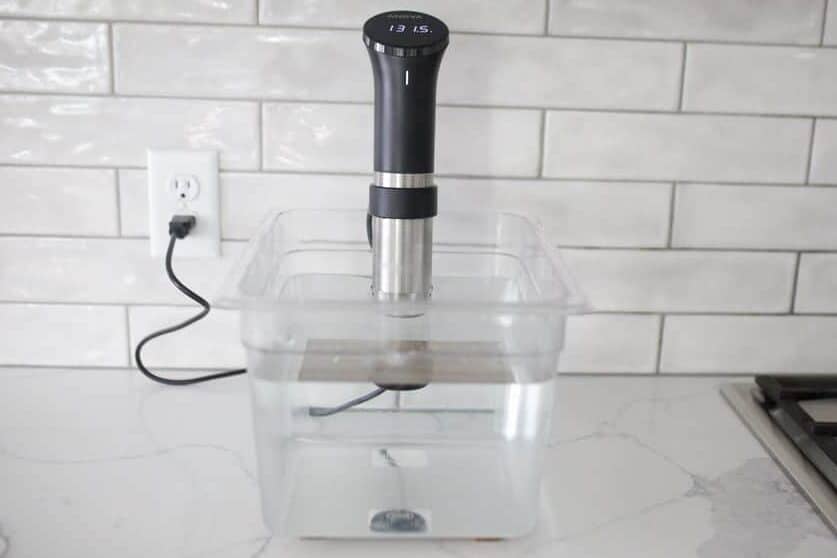
Fill your container (can be as simple as a big pot) with water and set your sous vide machine up according to its specifications. Find the appropriate time and temperature for what you are cooking or reheating.
The temperature will correspond to the internal temperature you desire (perhaps minus a few degrees to accommodate for the sear). The time will vary based on the density and thickness of that which you would like to cook.
You’re likely to find a recommendation for time and temp on this website via recipes, a sous vide app by the manufacturer of the immersion circulator, or any number of other easily accessible places.
Below is a summary of the times and temperatures sous vide for a few of the more popular foods that greatly benefit from reheating by immersion.
Sous Vide Reheating Time and Temperature Chart
| Food | Target Doneness | Temp | Reheat Time |
| Steak – 1 inch thick | Medium-rare | 130°F (54°C) | 40 minutes |
| Medium | 136°F (57°C) | 40 minutes | |
| Medium-well | 145°F (63°C) | 40 minutes | |
| Steak – 1.5 to 2 inch | Medium-rare | 130°F (54°C) | 1 hour |
| Medium | 136°F (57°C) | 1 hour | |
| Medium-well | 145°F (63°C) | 1 hour | |
| Pork Chop – 1.5 inch | Medium-rare: tender, juicy, meaty | 130°F (54°C) | 1 hour |
| Medium: just firm and juicy | 145°F (63°C) | 1 hour | |
| Medium-well: pretty firm, bit dry | 150°F (66°C) | 1 hour | |
| Chicken Thigh | Very juicy and very tender | 165°F (74°C) | 1 hour |
| Chicken Breast | Very soft and juicy | 140°F (60°C) | 1.5 hours |
| Salmon | Soft and Buttery | 110°F (41°C) | 45 minutes |
| Translucent, beginning to flake | 115°F (46°C) | 45 minutes | |
| Very moist, tender and flaky | 120°F (49°C) | 45 minutes | |
| Firm, moist and flaky | 130°F (54°C) | 45 minutes | |
| Halibut | Tender, beginning to flake | 120°F (49°C) | 45 minutes |
| Very moist, tender and flaky | 130°F (54°C) | 45 minutes | |
| Firm, moist and flaky | 140°F (60°C) | 45 minutes | |
| Tuna Steak | Very moist, barely firm | 105°F (41°C) | 45 minutes |
| Moist and meaty | 110°F (41°C) | 45 minutes | |
| Dry and firm | 130°F (54°C) | 45 minutes | |
| Shrimp | Translucent, semi-raw, soft/buttery | 125°F (52°C) | 15 minutes |
| Near opaque, tender but just firm | 130°F (54°C) | 15 minutes | |
| Just opaque, juicy and tender | 135°F (57°C) | 15 minutes | |
| Poached texture: bouncy-crisp bite | 140°F (60°C) | 15 minutes |
2. Season Your Food
Like any other method of cooking, seasoning is the crucial first step to producing a delicious dish. Immersion cooked dishes benefit from the seasoning being pressed right up against the main ingredient and ultimately immersed in the juices in low and slow fashion, which enhances the flavor.
Ignore this step if you are reheating food.
3. Bag It (perhaps with herbs, lemons, etc.)
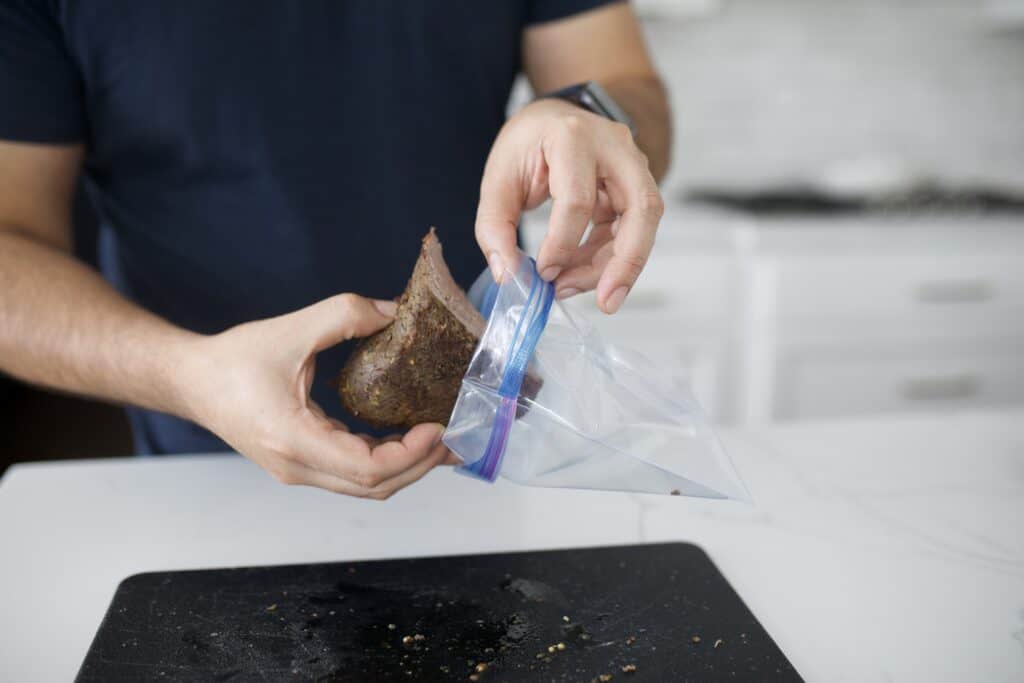
Place your seasoned food into the bag. Use either a food grade vacuum sealing bag, a plastic Ziploc like freezer bag, or a silicone Stasher like bag. Including aromatics like sprigs of thyme or rosemary or citrus slices placed against the main item will produce big flavor.
4. Seal the Bag
This is the crucial step where things can go sideways if not performed carefully. The objective here is to remove as much air as possible from the bag so that the food is essentially immersed in the water without an air barrier whatsoever.
Vacuum sealed bags make this step a breeze. For Ziploc and Stasher type bags you’ll want to use the water displacement method.
Press as much air out of the bag containing your food as you can and seal it almost all the way just so air can escape. Now, lower the bag into the water to displace the remaining air out of the bag and then completely seal on the follow. Be careful not to allow any water to enter the bag.
*Find our favorite vacuum sealer here!
5. Cook By Immersion
Simply clip the seal-side up bag (e.g. with a clothes pin or binder clip) to the container so that it is fully immersed.
If you use a vacuum sealed bag, clipping isn’t necessary, but you’ll want to make sure the bag remains fully immersed. A rack or weights can be helpful here.
6. Sear Meat or Fish
If you’re cooking a protein or even some vegetables, searing is critical to having it be plate ready. Not only does the searing process add color to the dish, but also adds depth of flavor, texture and locks in juices.
The critical steps to get a great crust are:
- Dry the protein (meat, etc.) thoroughly by patting it with a paper towel
- Season the protein generously with seasoning such as salt and pepper
- Use extremely high heat – a cast iron pan, outdoor grill, or searing torch are good options
Be careful not to overcook in this final step. Flipping often (e.g. every ~30 seconds for a cut of beef) can help avoid overcooking; This should not take long.
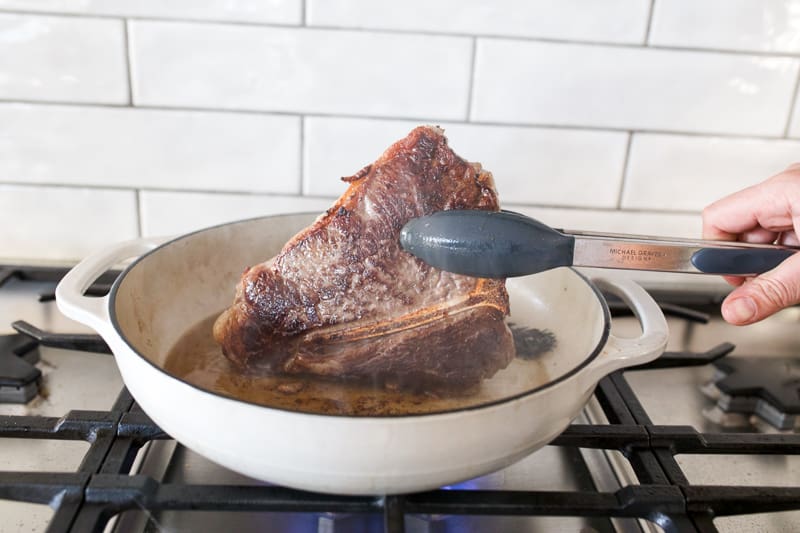
We’re looking to preserve the perfectly even doneness of the sous vide meat, while adding color, texture and taste to further its appeal.
7. Serve
Now you’re ready to hit it with some salt and plate it!
Sous Vide Device
If you’re new to immersion cooking, the only critical item you need to prioritize is the sous vide cooker. It’s a portable machine that clamps onto a container to circulate, heat and regulate the water bath to the desired temperature.
Immersion circulators include the Anova Sous Vide Precision Cooker series and the Breville Joule Sous Vide Cooker. For a more complete comparison of immersion circulators see our review of the 10 best sous vide machines.
Reheating Soup and Liquid Foods
Immersion cooking is a great way to reheat soups, sauces, and purée recipes without ruining the consistency, texture and flavor of them. If you reheat the item in a pot on the stove, the lack of temperature control can easily lead to thickening or a reduction of liquid foods.
Given soups are ideally served above 158°F, which is where Ziplock bags begin to lose their integrity, we would recommend silicone bags. Clear soups are generally ideally served at 210°F while thicker soups are best served 190°F to 200°F.
The smaller the bag, the more quickly and evenly the liquid food will warm. For that reason, we recommend parsing larger bags of liquid food into smaller bags. A gallon bag will take ~45 minutes. Smaller (e.g. quart size) bags will take less than half that time.
Reheating Frozen Food
Yes, you can sous vide frozen food! There’s no need to thaw, which can be very handy in a pinch or with meal prep.
The general guideline is to immersion cook frozen food at the same cooking temperature for about 1.5 times the regular cook time. That is, if you were normally going to cook a steak for 2 hours, you would immersion cook a frozen steak for 3 hours. In this case, the first hour is essentially defrosting the food in an hour vs the day or two in the fridge.
So yes, you can freeze your leftovers with confidence knowing you have a great way to revive them. We’d try and use the frozen leftovers within six weeks.
Learn more about How to Sous Vide Frozen Steak.
Reheated Sous Vide Final Thoughts
No other method of cooking, or reheating meat and other food, allows for as much control of the end product as immersion cooking.
The drawback is the time required, but it’s important to keep in mind this isn’t involved time where you’re actively cooking or reheating sous vide. What you gain for your patience is a cooking made easy meal; it will turn out just as you prefer it without any real risk of overcooking.
That being said, we realize there are times when the length of time needed is impractical and or the food being consumed frankly doesn’t deserve the time to be reheated via sous vide. Things like reheated bacon. Obviously, look to other methods like a microwave in those situations.
How to Reheat Steak Sous Vide FAQs
Yes, you can reheat steak in sous vide. Sous vide is the best way to reheat upscale leftovers like steak.
Of course you can reheat sous vide steak! Just use the same temperature or a couple degrees less the original cook.
You reheat sous vide steak at the same temperature you initially immersion cooked the steak (i.e the target internal temp) for the minimum recommended time for the cut of steak. General guidelines based on thickness would be 40 minutes for a 1″ thick steak, 1 hour for a 1.5-2″ thick steak. Longer for thicker items like roasts.
Chilling the steak briefly before searing will help keep the steak cooked evenly edge to edge.
Reheat sous vide steak for the same time as the lowest end of the recommended cook window for the steak. General guidelines based on thickness would be 40 minutes for a 1″ thick steak, 1 hour for a 1.5-2″ thick steak.
Reheat sous vide meat at the same temperature you initially immersion cooked the meat (i.e the target internal temp). For time, use the minimum recommended time for that cut of meat. Re-sear the meat following reheat.
